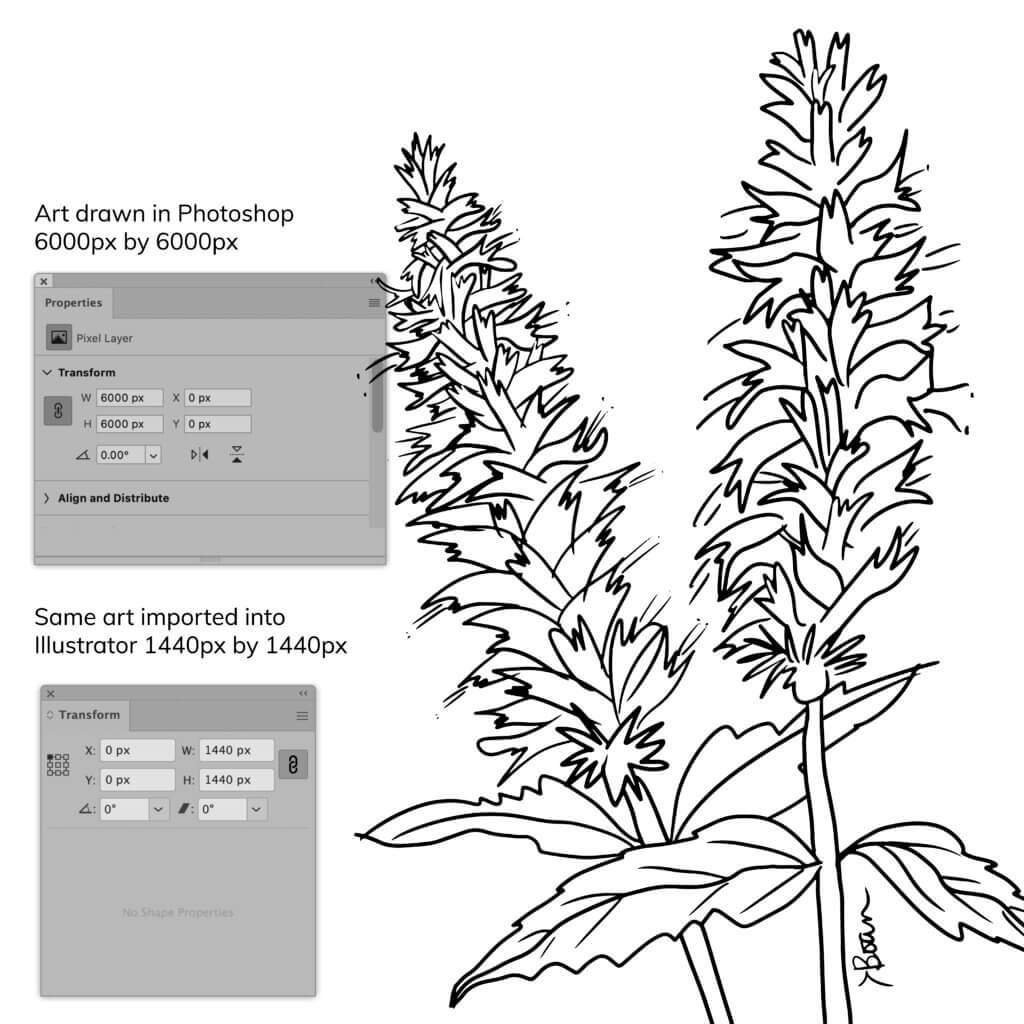
I have used Photoshop for over 30 years and Illustrator for over 4. I do most of my drawing in Photoshop or Procreate then bring the images over to Illustrator to vectorize them using Image Trace.
Recently I discovered that a pixel in Illustrator is not always the same physical size as a pixel in Photoshop.

I thought my ADHD was the culprit when my images continually didn’t import from Photoshop to Illustrator the size I expected.
Then I realized that I’m not screwing something up, but that the default resolution in Illustrator was causing the problem. That leaf I drew in Photoshop and was the right size in Photoshop isn’t at all what I intended when I imported it into Illustrator.
Some of this information is also important when you want to export a file into Photoshop or as a PNG/JPG. But in this post, I’m only going to talk about IMPORTING raster art into Illustrator from Photoshop or Procreate, how to make certain you get the physical size of the art and motifs you expect, and most importantly, how to make certain you’re getting the line thickness and quality you want in the raster art you vectorize.
Also, none of this matters if you are not using the lines and texture of the raster art you’re importing. Enlarging a circle without a stroke or any texture is a larger circle.
But enlarging a circle WITH an outline, detail lines or texture is a larger circle with it’s lines and texture fatter, thicker and bigger, and probably not what you wanted.
Illustrator's default resolution
In Illustrator, 72 pixels equals 1 inch. And because it is a vector drawing program, it doesn’t deal with resolution in the same way Photoshop does. So in Illustrator, the resolution is always 72 dpi. But in Photoshop or Procreate, if I am drawing motifs for an illustration or repeat pattern, I always start with a document that is at least 300 dpi.
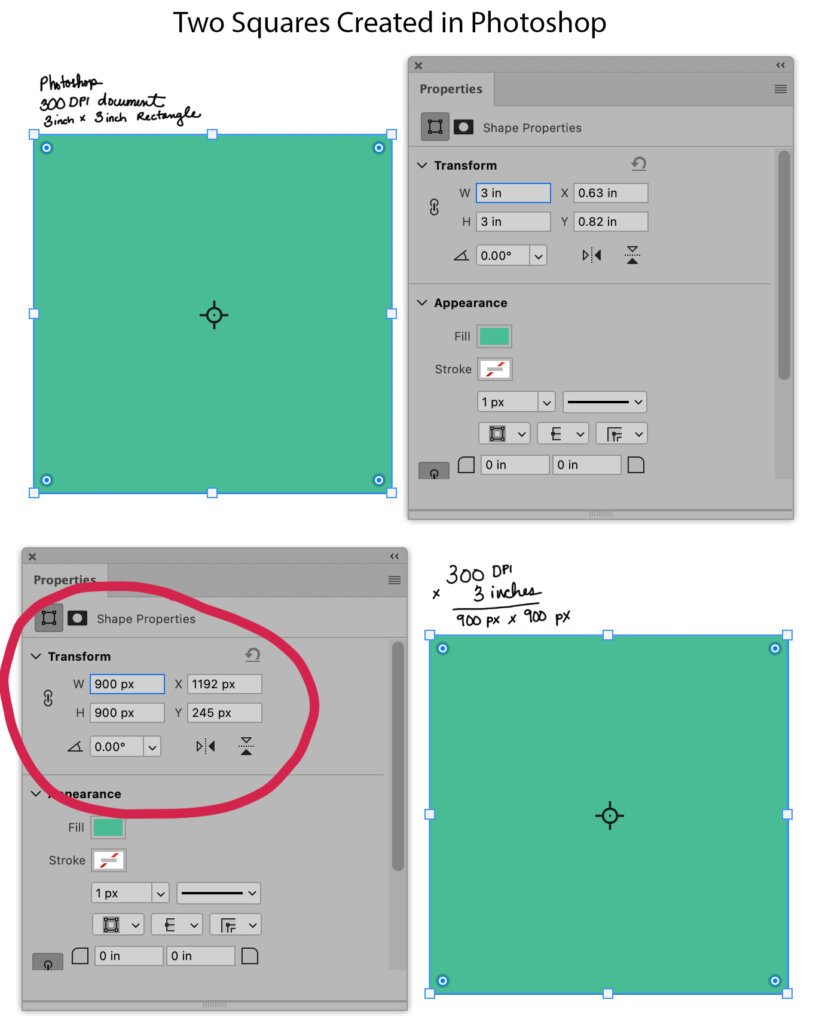
So first let’s look at the problem and see what we’re dealing with. Below are two green squares I created in Photoshop. The PSD was a 300 dpi document. The first rectangle was created at 3 inches by 3 inches. The second one was created at 900 pixels by 900 pixels. And you can see they are the same physical size.
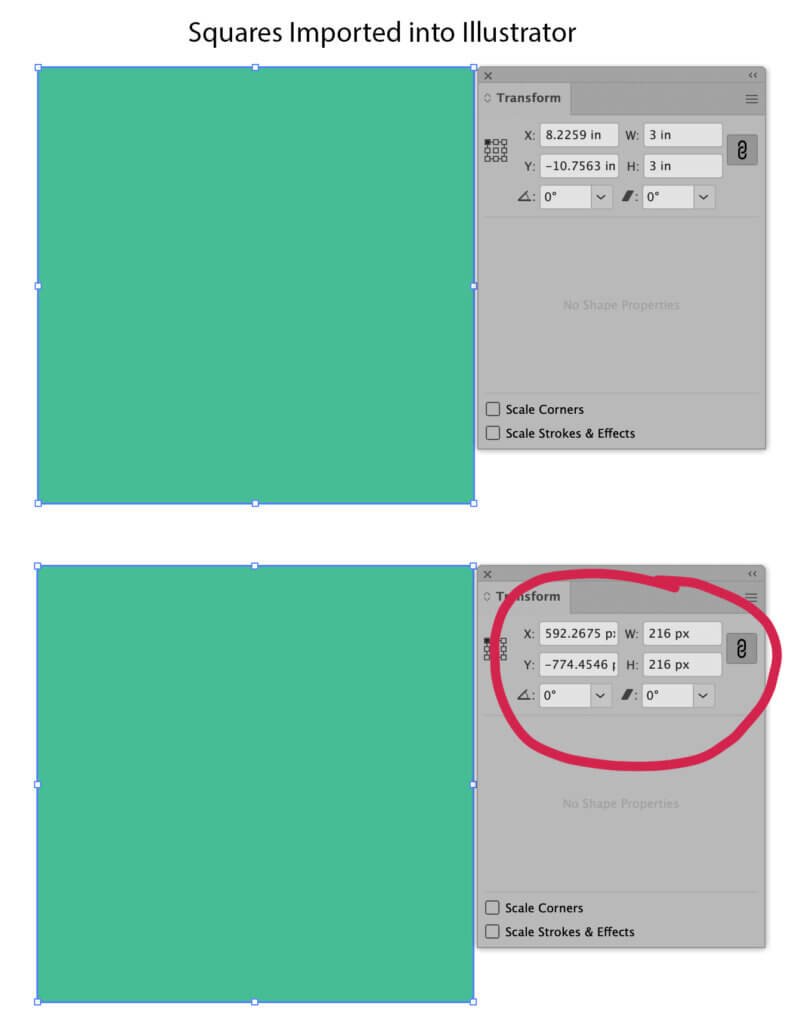
I then imported each rectangle into Illustrator by dragging them into a new document, shown below. As you can see, they are the same physical size visually, but they are no longer the same PIXEL size. The square created in inches and displayed in Illustrator as inches in still 3 inches by 3 inches square. But the 900px by 900px square is now 216 pixels in Illustrator.
So what's happening?
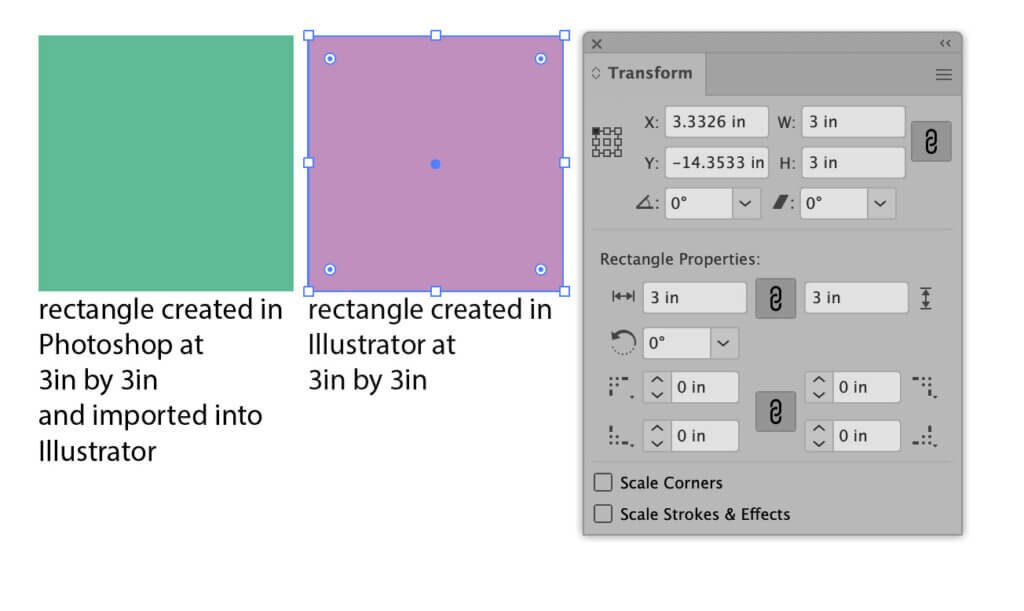
I suck at math and stuff like this makes my head hurt. But I think I can show you visually what is happening. Below is a green 3 inch square imported into Illustrator from Photoshop, and a 3 inch pink square drawn directly in Illustrator. The default unit of measure for this document was in INCHES. Notice they are the same physical size.
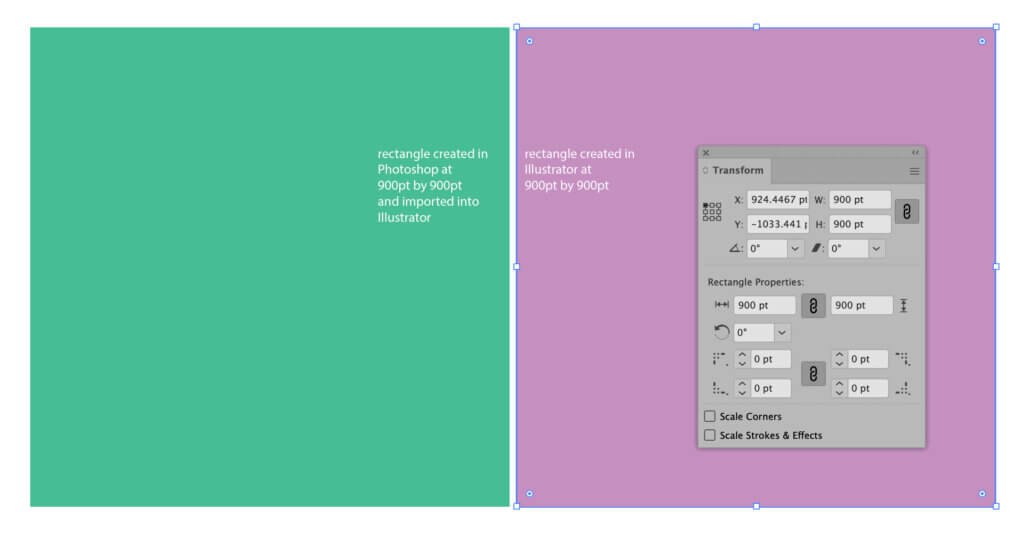
In the next image, the default unit of measure in Illustrator was changed to POINTS instead of inches or pixels. The pink square was drawn directly in Illustrator at 900 points by 900 point. You can see that the two squares are the same physical size.
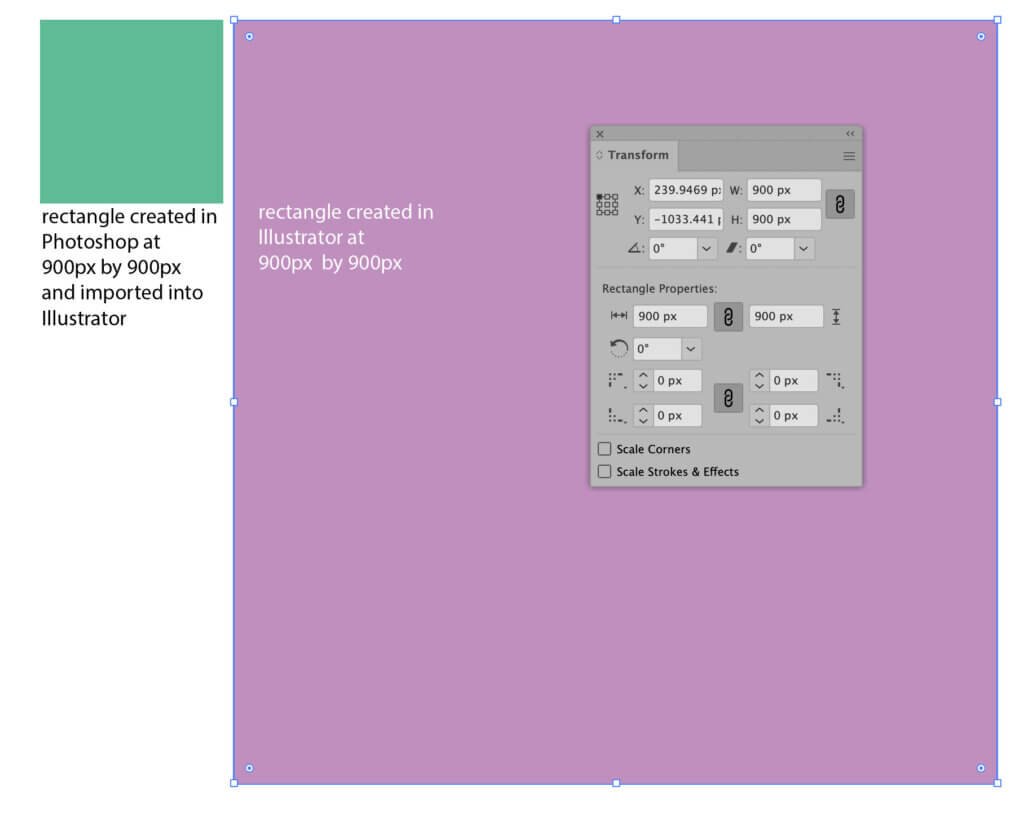
In this next image, the default unit of measure in Illustrator was changed to PIXELS. The green square was drawn in a 300dpi Photoshop document at 900px by 900px, and imported into Illustrator. The pink square created directly in Illustrator was drawn 900px by 900px. Notice a BIG difference in size?
That’s because PIXELS are not a set unit of measure. They will vary in size depending on the RESOLUTION of the document – or the dpi/ppi. The individual pixels of a Photoshop document set to 300 dpi/ppi are much smaller than the pixels of document set to 72 dpi/ppi. And remember: Illustrator’s default dpi is always 72dpi.
What do you do?
An inch is an inch – whether it is in Illustrator or Photoshop. It is a set or defined unit of measure. Of course this applies to centimeters as well. And this also applies to POINTS. Points are a set unit of measure that predates computers. In the publishing world, 72 points equaled an inch. When Adobe created Illustrator and Photoshop, it took that concept and applied it to PIXELS. Hence the reason why low-resolution raster files have a resolution of 72 ppi/dpi.
If you are importing art into Illustrator from a raster program in order to vectorize it using Image Trace, you might want to work in a defined unit of measure like inches, centimeters or points in Photoshop or Procreate AND Illustrator so imported art doesn’t come in much smaller than you anticipate.
This is especially true if your imported art from Photoshop contains linework, texture and details that you plan on vectoring and keeping as part of your art.
Obviously once the linework is vectorized you can resize it to whatever physical size you need. BUT, the linework and texture will get thicker or fatter as you scale the art up, and thinner as you scale it down.
In the end, you can obviously do whatever is comfortable for your established workflow. If you work in pixels and like working in pixels, just keep in mind the potential problems I’ve outlined here and you’ll be fine.